Headlines

Showing posts with label iPhone. Show all posts

How to Block Emails on Yahoo Mobile

12:55 AM

Block Unwanted Emails from Senders in Yahoo Mobile 

how-to-block-emails-on-yahoo-mobile
Block Unwanted Senders on Yahoo Mobile
Want to block emails on Yahoo mobile app? Well, this article is for you. Here we are sharing a quick method to block emails on Yahoo mobile. Blocking emails on Yahoo mobile is just a simple task. You just need to open yahoo mobile app and follow some simple steps. Once you block emails on yahoo mobile, you’ll not receive any messages from the blocked person. So, if you’re feeling swamped with too many messages on your yahoo mail mobile app, keep reading this post and follow the step by step procedure. Here, I’m going to explain how to block emails on Yahoo mobile.
Although you can also block emails on yahoo using third-party apps. There are dozens of email filter apps available in the market but here, we are going to share some clever tricks to block emails on Yahoo mobile without using any third-party app. Here’s how to block emails on Yahoo mobile.
In this article, we are going to share different methods to block emails on both Android as well as iPhone app.

How to block emails on Yahoo mobile: android

Step 1: open yahoo mail app on your android device.

Step 2: open or select a message (make sure you are selecting a message from the sender you want to block on yahoo).

Step 3: click More and then click Block.

Step 4: check “send all future emails to spam” and “delete all existing emails” (if you want to delete all the existing emails from the person).

Step 5: click OK.

Now, all the future messages from the sender you’ve blocked will be directly forwarded to spam and will not appear on your inbox.

Note: this process will only work if you have an existing message from the person you want to block on Yahoo mobile. If you don’t have any messages from the person you want to block, you can follow the steps given below.

Step 1: open the yahoo mail app and go to settings.

Step 2: click Banned addresses.

Step 3: now, click on add an address field and enter the desired email address.

Step 4: click Ban.

That’s it! Now, you’ll no longer receive any messages from the person you’ve blocked. The same process needs to be followed to block emails on yahoo iPhone. See the method below.

How to block emails on Yahoo mobile: iPhone

Step 1: open yahoo mail app on your iPhone.

Step 2: open or select a message from the person you want to block.

Step 3: click More and then click Block.

Step 4: check “send all future emails to spam” and “delete all existing emails” (if you want to delete all the existing messaged from that sender).

Step 5: click OK to apply changes.

So, this is how you to block emails on yahoo iPhone. Try the above method if you want to get read of spam emails on yahoo. Hope you like this article on how to block emails on Yahoo mobile.  

4 Simple Tricks to Block emails on iPhone

9:07 PM

Block Unwanted Emails on iPhone and iPad

how-to-block-emails-on-iphone
Block Emails on iPhone
Feeling swamped with too many emails on your iPhone? Here’s the trick to get rid of this problem. In this article, we’ll walk through the steps of blocking emails on iPhone. Blocking emails on iPhone means disallowing a person or a group of people from contacting you and sending you messages via email (electronic mail). So, if you’re finding yourself in a situation where you want to block emails on your iPhone, keep reading this post and follow the step by step process to know how to block emails on iPhone.

Although, blocking emails on your pc or another device will also work on iPhone if you are using the same email id on both devices. You don’t need to block emails on each device separately, however, if you’re using your email account on iPhone only, you need to block emails on iPhone. Here’s how to block emails on iPhone.

Block emails on iPhone Gmail

Blocking emails on iPhone Gmail is very simple. All you need to do is just add the email address of sender you want to block in blocked senders list. Here’s how do I stop spam emails on my iPhone.

Step 1: Log into your Gmail account via mail.google.com.

Step 2: go to your Gmail inbox and open a message from the sender you want to block.


Step 3: click the small triangle drop-down icon appears at the top right corner of the message window (see the picture below). 

how-to-block-unwanted-emails-on-iphone

Step 4: select block the sender option from the drop-down menu.


Step 5: when you click on block sender option, you’ll be prompted to confirm that you really want to block the sender. A pop-up window will appear, click Block to block the sender (see the pic).
how-to-block-emails-on-iphone-gmail
Note: sometimes, you’ll find that for some sender such as Google itself, the drop-down menu item block SenderName is not available hence you can’t block a sender using the above method. In that condition, you can block a sender using this method how to block emails on Gmail.

How to block emails on iPhone using iCloud Mail?

iCloud Mail is a free email service provided by Apple. Apple provides a lot of feature via iCloud mail such as ample storage, IMAP access, and an elegantly functional web application.

Step 1: login to your iCloud mail account via www.icloud.com.

Step 2: click on gear icon appears at the bottom-left corner of the iCloud mail screen.

Step 3: locate a menu called Rules in the pop-up menu.

Step 4: on the Rules window, click Add a Rule to add a new email rule.

Step 5: enter an email address you want to block in the text box below the heading “is from”.

Step 6: now, click the dropdown named as “Then” at the bottom of the menu. It will prompt a drop-down menu.

Step 7: select the option “Move to Trash and Mark as Read” from the drop-down menu.

Step 8: now, click Done at the bottom of the menu.

Once you enter an email address you want to block and click Done, a new rule for you iCloud mail inbox will be created and any future messages from the person you’ve blocked will be moved to the trashed folder. Hence, you’ll no longer receive any spam emails on your iPhone.

How to block emails on iPhone Yahoo?

Step 1: login to your Yahoo mail account.

Step 2: click the gear icon appears at the top-right corner of the screen. A drop-down menu will appear.

Step 3: click More Settings from the drop-down menu

Step 4: click security and privacy appears on the left side of the page.

Step 5: now, click add button adjacent to the blocked addresses to add emails to the blocked addresses list.

Step 6: now it’s time to block emails. Enter the email address you want to block into the email address text box.

Step 7: click the blue Save button below the email address field.

That’s it! This is how to block emails on iPhone Yahoo. All the email addresses you’ve added to the blocked senders list will be blocked on your iPhone and you’ll no longer receive any future emails from these senders.

How to block emails on iPhone outlook?

Using outlook email on iPhone? Follow the method given below to block emails on iPhone outlook.

Step 1: login to your outlook account via outlook.com.

Step 2: click the setting’s gear icon to open the settings popup menu.

Step 3: click View full settings from the pop-up menu.  

Step 4: click the Mail tab from the left side of the window.

Step 5: click junk email.

Step 6: now, enter the desired email address you want to block on your iPhone in the text box appears at the top of blocked senders window.

Step 7: click the blue add button adjacent to the email address text box.

Step 8: click the save button at the top of the settings window to apply changes.

This is how to block emails on iPhone Outlook. Now, all the messages coming from the sender you’ve added to the blocked list will be blocked and outlook will automatically send them to the trash folder.

So, this is how to block emails on iPhone Gmail, iCloud, Yahoo mail and Outlook. Hope you like this article.


How to block websites on iPhone

12:00 AM

Block a specific website on iPhone and iPad

how-to-block-websites-on-iphone
Block a Specific website
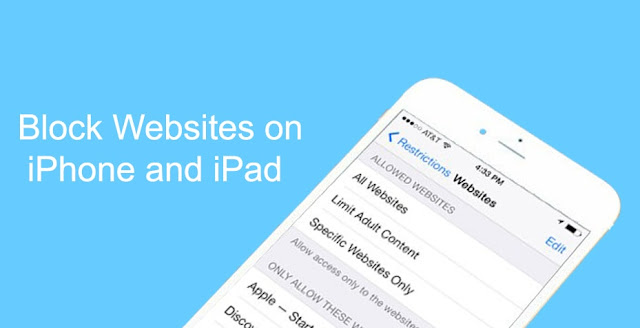
With the increasing use of the smartphones, the use of the internet is also increasing widely. As we surf a lot of stuff every day and make use of the internet for many things, sometimes we found that some unwanted websites open accidentally, or some advertising sites start interrupting, these sites may contain viruses. In this condition, blocking websites could be a very good decision. Here I’m going to explain how to block websites on iPhone.

Find Out How to Block a specific website on iPhone-

Step 1: On your iPhone, launch the settings app form the home screen.

Step 2: Click on the General tab under settings.

Step 3: Click on restriction tab and click enable restrictions.

Step 4: Type a 4-digit password into the password field.

Step 5: Confirm your password, by typing it again

Step 6: Click on websites under the allowed content

Step 7: Click on the limit adult content

Step 8: Click on add a website under never allow

Step 9: Type the URL of the website to be blocked in the website field and click done.
That’s it! This is how do I block a specific website on iPhone. You can now check if the sites are accessible by visiting the website.

How to block websites on iPhone by creating a whitelist?

You can also block all the sites by allowing only a list of particular websites to the whitelist. You need to follow steps given below, in order to add sites in the whitelist and block all other sites on iPhone-

Step 1: Launch the Settings app from the home screen.

Step 2: Click on the general tab.

Step 3: Click on the restriction tab and click on enable restrictions.

Step 4: Type a 4-digit password when asked.

Step 5: Confirm your password by typing it again.

Step 6: Click on websites block.

Step 7: Click on specific websites only.

Step 8: Enter the websites list that is to be allowed visit (only these websites will be accessible on your iPhone and all other websites will be blocked).

Step 9: Write the URL on the block and click Done.

How to block websites on iPhone using OpenDNS?

OpenDNS services provide parental control services to people. It provides the security services to your system from phishing and content filtering. Thus, we can also block websites via OpenDNS with the help of the content filtering feature. Follow the steps given below to block websites on iPhone using OpenDNS-

Step 1: Go to the Settings and select Wifi.

Step 2: Tap on the blue arrow shown along with the wifi that is connected.

Step 3: Now, change the Router’s the DNS server.

Step 4: OpenDNS servers are 208.67.222.222 (default DNS) and 208.67.220.220 (alternative DNS).

Step 5: Click on renew Lease (Switch off Wifi and switch on it back).

You can either think about blocking the websites that are inappropriate or you can either whitelist the websites that you feel are appropriate. Blacklist simply blocks the websites that are listed into the list, it does not allow them to be viewed or opened. You cannot open a website that is listed into it, but other than blocked websites, you can easily access other websites. Whereas, whitelisting is the feature that allows only listed websites and blocks all other websites. You cannot view or access other sites that are not listed into it. Thus, a limited website can be opened through whitelisting feature on your iPhone.

Hope you like this article on how to block websites on iPhone. Want to block websites on android? you may visit How to Block Websites on Android
 
Copyright © Tech Tips and Tricks